How to Create an Email Mailing
1. You will need to have a template created before you can send a mailing. From the main navigation, hover over Mailings, scroll down to Templates, and then select Email Templates.

2. Next, select ‘Add Email Template’.

3. Name your Email Template and choose the type of template that you are creating. You can select whether or not it is Active and add a Description if you would like too.
NOTE: The Template Type that you choose will affect which type of fields that you are able to download to export and then import into your email provider, or to use for our integrations with Mailchimp and Constant Contact. We send over First Name, Last Name, and Email Address only. Any additional fields that you’d like to send over, we recommend exporting out of Eleo, and then importing into either email marketing platform. If you would like to include event fields, choose an Event Template. If you would like to include membership fields, choose a Membership Template, etc.

4. Select the fields that you would like to pull from Eleo for the email. Once you have all of the necessary fields checked, click on the ‘Add’ button in the middle of the screen to add them. If you want to add all of the fields, you can simply choose the ‘Add All’ button.
Alternatively, if you added one or all fields in error, you may select the ‘Remove’ or ‘Remove All’ buttons. You may also reorganize the order of the fields using the Top, Up, Down, and/or Bottom options on the right-hand side.

5. When you are done adding and arranging all of your fields, click on ‘Save’ in the upper right-hand corner of the screen.

-
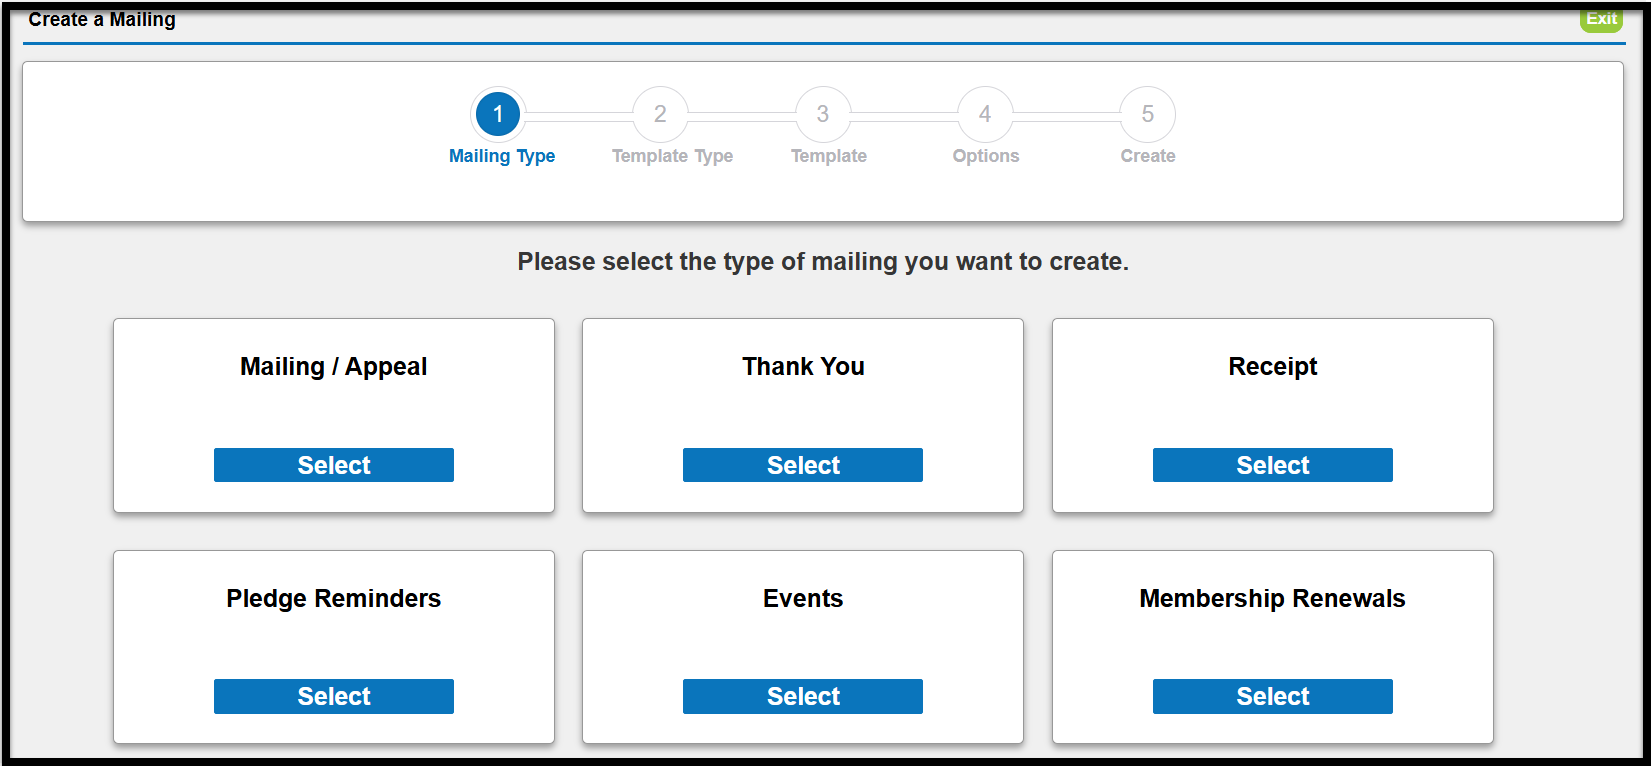
Go to Mailings > Create a Mailing. Choose the type of Mailing you want to create (should match the template type you made).

-
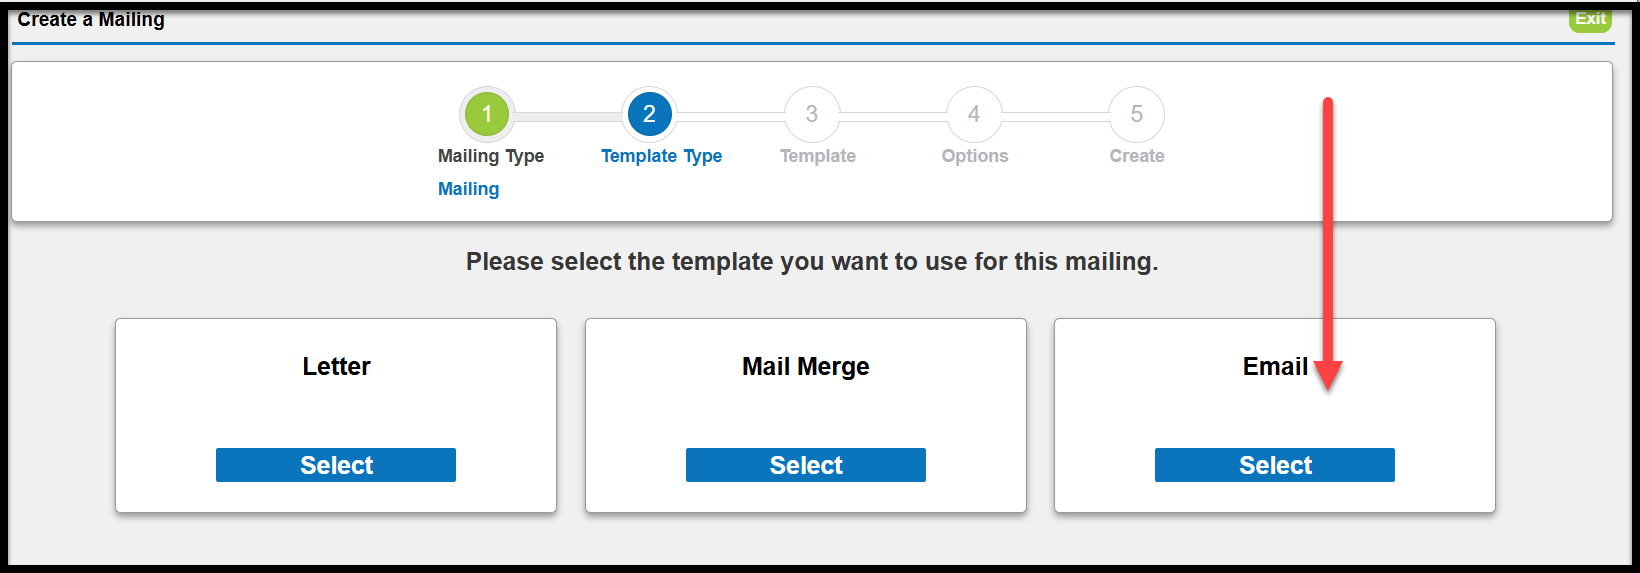
Choose Email as the template type you want to use.

-
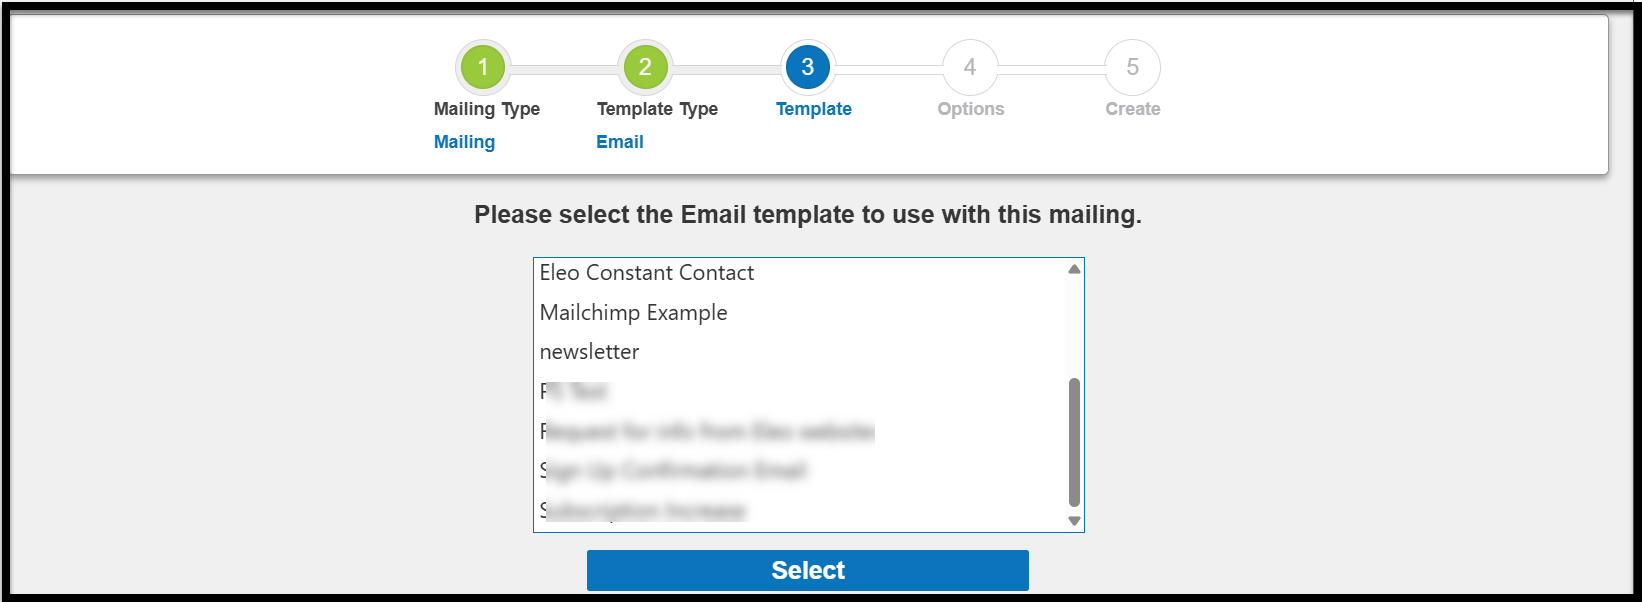
Choose the template you want to use.

-
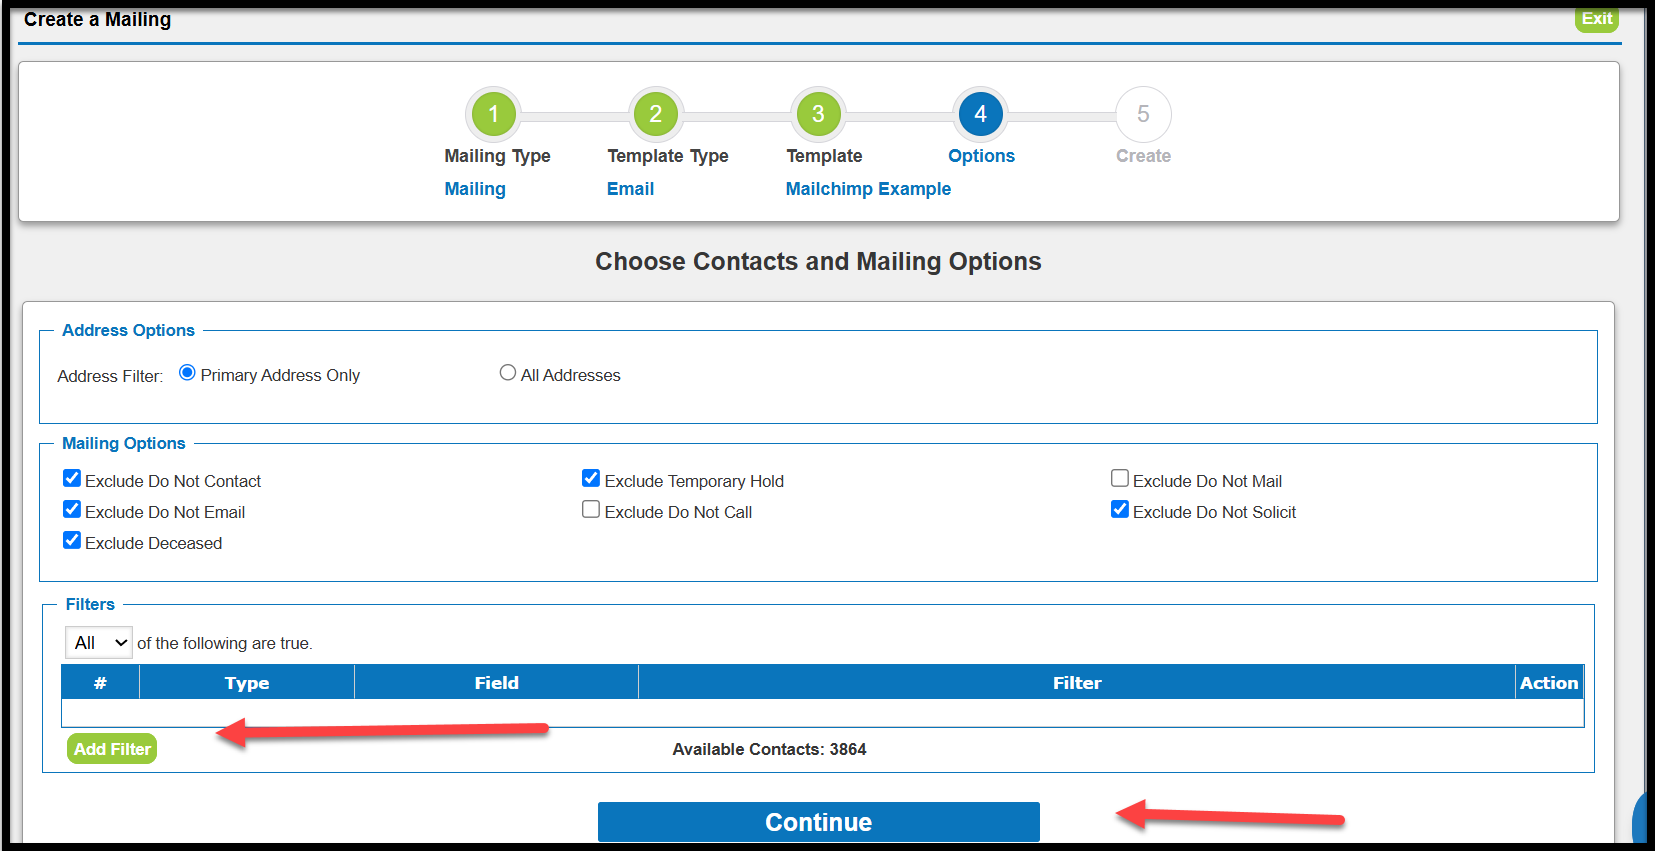
Now it's time to choose which contacts you'd like to include in your email.
Address Options:
This setting determines which email addresses are used. Select Primary Email Only to send to each contact’s main email address, or choose All Addresses to send to every email address listed in the contact records that match your other criteria.
Mailing Options:
By default, common exclusions are already applied. You can review and adjust these settings as needed.
Filters:
Use filters to narrow down your list to specific groups of people. If you’d like to send the email to everyone in your system with an email address, you can skip this step.
When you're ready, click Continue to move on.

-
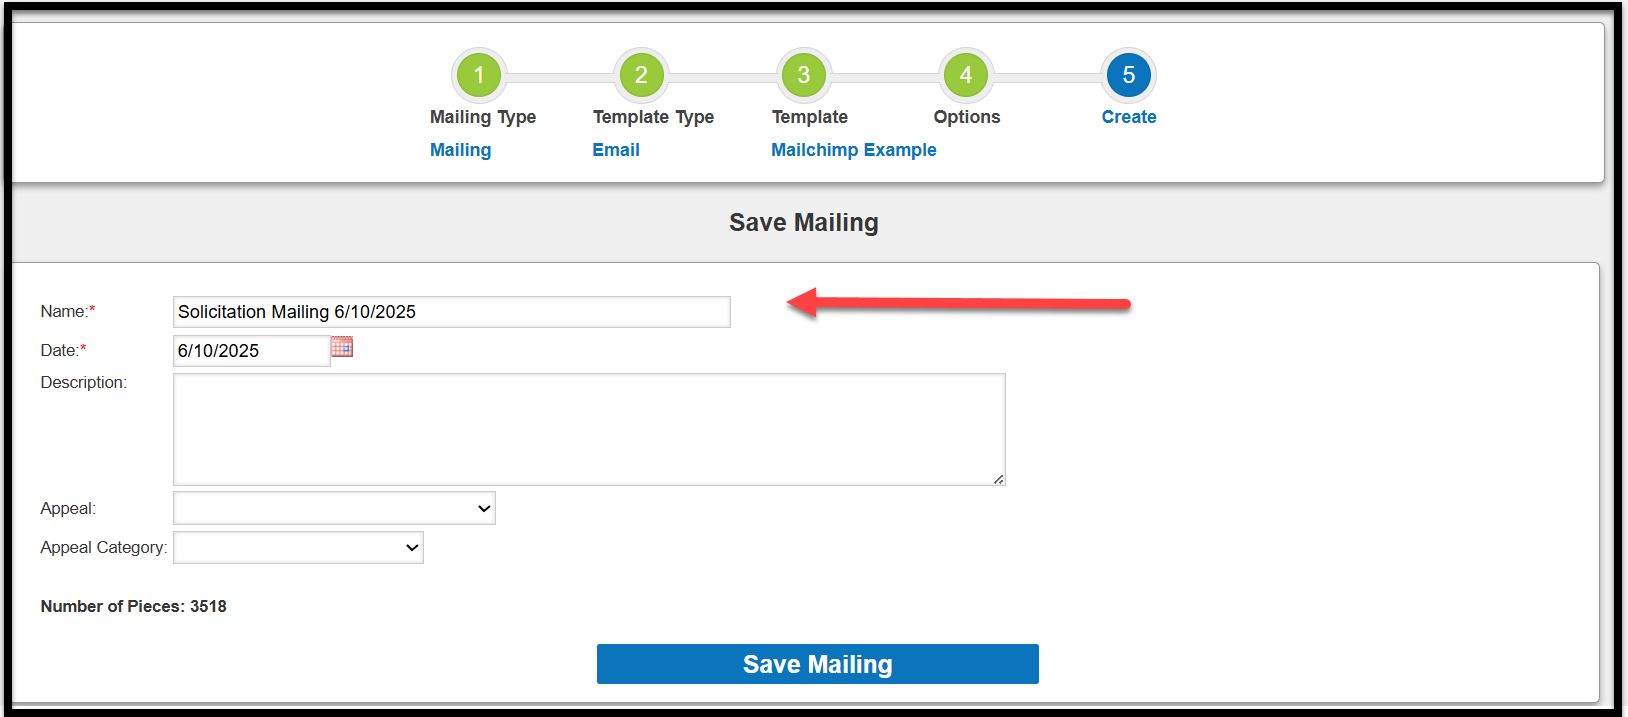
A default name will be provided for the mailing, but you can update it to whatever you’d like.
Important: If you're sending this to Mailchimp, the mailing name must exactly match the name of your Mailchimp campaign.
Date: This will default to today’s date, but you can change it if needed.
Description: Optional—add any notes or details that might be helpful for your internal team.
Appeal & Appeal Category: These are also optional but can be selected if you'd like to associate the mailing with a specific appeal.
You'll see the Total Number of Pieces, which reflects the number of contacts or email addresses after applying filters and exclusions.
When everything looks good, click Save Mailing to continue.

- After a brief moment, you’ll see the final page of the Mailing in Eleo. Here, you can review all the settings and selections you made.
- Mailing List Report: Generates a report of everyone included in the mailing. You can download it as a PDF, XLS, or CSV file.
- Download: Exports a CSV file containing all the data used in your email template.
-
Mark Mailing as Sent: Logs the mailing in each contact record to show they received it.
Note: This does not actually send the mailing—it only records it in the system.
- Send to Constant Contact or Send to Mailchimp: If your Eleo account is integrated with either platform, the appropriate button will appear. Follow the on-screen prompts based on your selected integration.
You can also search for a specific name in the list below, or click Remove on the right-hand side to exclude someone if needed.
